Monday, 23 October 2017

Free brick stitch pattern with tutorial


brick stitch cloud pattern

I have learned a new technique called brick stitch and wanted to share with you the steps that made sense to me when trying to understand this technique. So I made a free pattern and a youtube tutorial on how to make this cute cloud using miyuki delica beads. It measures about 2x2cm (less than 1"x1").

brick stitch cloud pattern

In the tutorial I'm using HAMA beads and contrasting yarn so it's easier for you to see what I'm doing. To get the tiny charm I'm using miyuki delica beads.

You will need:

About 1m/1yard of thread (I used fireline)
Beading needle (size 12)
Miyuki delica beads


 You can use the charm as a pendant, on paperclips, thumbtacks, earstuds, to decorate a pen and many other things. 
What would you use it for? 


For full tutorial on youtube:

https://www.youtube.com/watch?v=vOaMkl0ICms


post signature

Thursday, 13 July 2017

Free tutorial for earring organizer made from two picture frames


I'm so happy to share with you my tutorial for this organizer. I've been having this idea for months and when instructables' had a contest titled "before&after" it helped me get started.

 I'm so pleased with how it turned out and that I got motivated to start. Since I love thriftshopping I have loads of beautiful jeewelry, but they are not stored in a good way that does them justice. This will be one of the many boxes I will make. 
For the full tutorial and more pics visit my instructable:


Next I have a plan to tackle my collection of rings. I also filmed the process with this earringorganizer. 
Let me know if you would be interested in seeing a video of this or if you prefer textbased tutorials like this one. There are only so many hours in a day and I need to know what to tackle first :)

Until next time: Keep crafting!
 
post signature

Wednesday, 28 June 2017

Special occasions - Christmas card

Fabrika fantasy digistamp first flower


How is the summer going in your part of the world? 
If it's hot - you'll understand the theme for my card. 
If it's cold - you'll understand the theme for my card :D
Besides, you can never start Christmascards too soon, right?


Fabrika fantasy digistamp first flower


This bi-weekly challenge on the Ilovepromarkers challenge blog is:

Special occasions

We are sponsored by fabrika fantasy and the winner of this challenge will win 3 images of their choice. 
All you need to do is create a card using any promarkers to color your image and follow the theme.
 I hope you'll join us.

Fabrika fantasy digistamp first flower

I used the image "first flower" and had a hard time corperating the image into the theme. I thought it would be wonderful for an easter or "spring is here" kind of card. However - I wanted to challenge myself and came up with the idea to only use parts of the image. That's the great thing about big scenery images - you don't have to use them as they are.


Image taken from fabrika fantasy website.
 

Fabrika fantasy first flower card


Today's promarker tip:
If you don't have cardstock in the exact shade to match your patterned paper you can color it using your promarkers. 
Simply choose a color that's a lighter shade of the one you want. You can use several promarkers to get the perfect match. Here I used rose pink first and lavender on top to get my cardstock to match the purple patterned paper.

Promarkertips by kamadesign


Challenges:
Crafty creations - Anything goes
Crazy 4 challenges - Some kind of water
Creative inspirations - Dots and/or stripes
I love promarkers - Special occasions
Little red wagon  - 3 of a kind (I used 3 circles and 3 patterned papers)
Simon says wednesday - Anything goes

Image: "First flower" from fabrika fantasy.
Promarkers: ice grey 1,3 and 5, cool grey 2 and 5, ivory, blush, oatmeal, rose pink, lavender, tea green, pastel green and soft green.
Papers: "Curiousity" be creative! by Pandurohobby, scraps from Christmas papers.
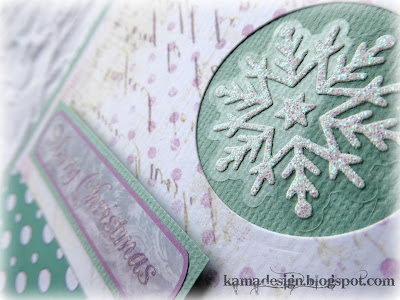
Others: Stickers (snowflake and sentiment), sakura gelly roll, stickles "star dust" and liquid pearls "white opal"

Until next time: Keep crafting!

post signature

Friday, 16 June 2017

Monochrome card with promarkers

The lady paper shelter card detail

Where do the days go? I can't keep up.
It is time for another "I love promarkers" challenge.
This time the theme is:

Monochrome

We are sponsored by:
I have used different shades of grey and a grey/beige color for the skin. I don't think I've ever tried making a black and white image before so it was quite a challenge (which is kind of the point). 

The lady paper shelter card

Please join us in the bi-weekly challenge. You can use any image you want. The only thing you need is to use any of the promarker types and follow the theme (monochromatic).

I hope you'll join us this time :)


Challenges:
Crafty creations - anything goes
Fab n funky - vintage
I love promarkers - monochrome
Moving along with the times - embossing wet/dry
Simon says - touchy feely


Image: "The lady" from the paper shelter.
Promarkers: ice grey 1,3 and 5, cool grey 2 and 5, warm grey 2, putty and blender.
Papers: "Floral with definitions" Midnight kisses by heidigrace.
Dry embossing folder: Cuttlebug.
Others: Pearl flatstones, lace ribbon.


Until next time: Keep crafting! 
post signature

Wednesday, 31 May 2017

New DT member for the ilovepromarkers challenge blog!

Captain Colin digital delights image

Today will be all about bragging :D
I'm here to share the news with you that I'm officially the newest member of the 


I actually got an email asking me if I would like to join them.
I got headhunted, lol! 
I'm so excited!

Promarkers have been my favorite coloring medium through the years. I'm always curious about new ways to color and have tried most of them, but I keep going back to my beloved promarkers every time.

Captain Colin digital delights promarker coloring
Promarker colors used for this card.

 I like that there are 148 colors. It's quite a few, but not so overwhelming that you don't know where to start.  I have around 120 of them.
You don't need that many to get a good range of colors. What I would recommend is to start with two colors in the same shade - one darker and one lighter. For example: you can have ice grey 1 and 3. This will let you build up the colors and blend them together.
So instead of buying one pen in each color family (eg. a yellow, a pink, a red etc) I would go for two reds (one darker one lighter that work together), two greys and so on depending on your budget.
This will let you be able to work up shades.

Captain Colin digital delights card
Text says "you are a star".

The first challenge on the ilovepromarkers blog that I am joining is up right now. I have used the digiimage called "Captain Colin".
The theme is:

Superheroes

We are sponsored by 
Digital delights 


Make sure you join us in the new bi-weekly challenge. 


Challenges:
Alphabet challenge - F for feathered friends (feathers on my hero's cap)
City crafter - out of this world (I used stars & a superhero)
Creatalicious - anything goes
Creative inspirations - favorite things (promarkers and diecuts)
Everybody art - anything goes
I love promarkers - superheroes/for a child
Penny's challenges - anything goes
Simon says - we're going around in circles
Southern girls - anything goes


Image: "Captain Colin" from digital delights.
Promarkers: ivory, oatmeal, ice grey 1,3 and 5, burgundy, poppy, berry red, lipstick red and cocktail pink.
Papers: "Christmas dot" Art blanché by eksuccess, to the rescue by 2bugsinarug, "Floral with definitions" Midnight kisses by heidigrace.
Dies: Spellbinder's circle and quickutz star.
Others: tiny goldbeads and metal gold star.

Until next time: Keep crafting! 
post signature

Tuesday, 2 May 2017

Easy upholstering of ottoman

Upcycled ottoman with storage
The ottoman measures about 65x45x45cm.
 Today I'd like to show you an easy way to freshen up a boring and plain piece of furniture. Unfortunately I seem to have misplaced the "before" photo, but I can just let you know that the cover of it was a beige muslin cloth type of fabric.
I started by removing the old piece of fabric which was actually removable for washing. After doing that I had this foam kind of situation going on. I decided that it was too thin to leave as is because we use the ottoman as an extra seat sometimes and no one really wants to sit on it. Instead I decided to add two thin layers of batting which really added that extra butt-comfort :) 

Upcycled ottoman with storage - backside of cover

I think the batting was a leftover piece from a quilt project so it's organic cotton. I cut it so it fitted around the lid and attached it with a staplegun.

Upcycled ottoman with storage - sideview

As I went around with the staplegun I made sure the batting fitted snugly pulling it as I went along. I started attaching a few staples on the longer side, then on the opposite side, pulling the fabric tightly. Then a few staples on one of the shorter sides and finally the last side. 

Upcycled ottoman with storage - cornerview

After the batting it was time for the fabric. I had sewn around the edges with a zigzag stitch to stop it from fraying and then prewashed it. I attached the fabric the same way I did the batting, starting on one of the longer sides with a few staples and so on.
When I saw that everything looked good I went around the lid with the steplegun adding more staples. In the end I had a staple every 1-2 cm (1/2-1"). This seemed to hold the fabric in place. 
This ottoman has now been used for at least a year or two and holds up very well. The fabric has not sagged and it's not as uncomfortable to sit on anymore as it was before. 
I'm very pleased with the finished look and the way I placed the pattern of the fabric. 
What do you think and have you any furniture that would need some sprucing up like this?
 Comment down below and let me know.

Until next time: Keep crafting!
post signature

Tuesday, 18 April 2017

Ring with freshwater pearls

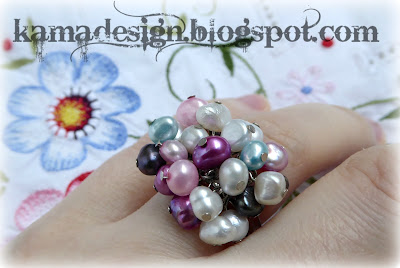
Handmade ring with freshwater pearls 

A quick post today showing you a ring I made a while back. 
Don't think I've shown it on the blog so here it is.
It's made out of differently colored freshwater pearls. 
It's a perfect way to use up any leftover beads in different colors you might have.

Handmade ring with freshwater pearls

 So what do you think? 
Would you wear it?
Let me know if you'd like a tutorial on it.

Until next time: Keep crafting!


post signature

Tuesday, 11 April 2017

Thrift store bunny repaint using 3 chalk paint techniques

Hello again my dustbunnies.
Link to my latest youtube video:
 
 
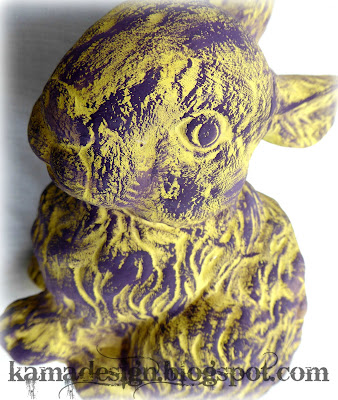
Easter bunny repaint using chalk paint look 1
 
Today I have a very eggciting post for you just in time for easter.
 
One of the best part of thriftshopping for me is to be able to find something "ugly" or unfinished and transform it into something "new". Sometimes I'm happy with the result, sometimes it looks even worse than before, but at least the potential is there. 
I love that feeling of a diamond in the rough 
that no one else can see.
 
What is your favorite part about thriftshopping?
 
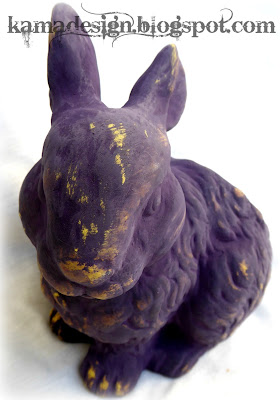
Easter bunny repaint using chalk paint look 2
 
I have made a youtube video tutorial where I show three different looks you can achieve using chalk paint. 
Which one is your favorite?
 
Easter bunny repaint using chalk paint look 3
 
Before:
Easter bunny before repaint with chalk paint


Until next time: Keep crafting! 
 
post signature

Tuesday, 4 April 2017

Crocheted kitty amigurumi for charity


Hjärtekatten amigurumi kitten

Hello my lovely dustbunnies and welcome back to my blog.

Today I have a very special friend to show you. 
Meet "hjärtekatten" (="heartcat").

The heartcat is made for children that are hospitalized due to heartconditions. The pattern is free and you can send your finished cat to the charity (pattern is in swedish):


Hjärtekatten amigurumi kitten detail

I've implemented a new rule in my crafting life lately: 
finish a project within a year or get rid of it. If you haven't finished it chances are you never will. Do you have the same problem with half-finished things around the house?

So the parts for this cat have been done years ago. All I needed was to assemble it, but never did. I finally got around to it and stitched the pieces together. He even got a cute scarf to match.

Unfortunately since I used plastic pellets for the bottom and end of paws I couldn't donate it to children. Instead I gave him to a relative that have had serious healthissues lately. She had actually knitted a cat and gave me so I thought it fitting that she should get one back. You're never too old to get cheered up by a friend like this, am I right?

Hjärtekatten amigurumi kitten side

Do you have the same problem as I do with unfinished projects?
Comment down below and let me know.

Until next time: keep crafting!

post signature

Tuesday, 28 March 2017

Organizing box for teas tutorial


(You can find the whole tutorial and vote for me)


Hello my fellow dustbunnies.
Are you ready for another free tutorial?

This time I was in desperate need to get my loose tea sachets organized. And as luck would have it, instructables had a competition in categories "papercraft" and "cardboard" so I got motivated to make a tutorial and entered both contests with this project.

Organizing box for teas made from cardboard


If you like this project, take a minute to vote for me. Click the orange "vote" button in the top right corner on my instructable. 
You need to have an account on instructable to be able to vote. Having an account enables you to vote, save your favorite projects and make your own tutorials. There are tons of great tutorials on all kind of subjects so it's worth checking out.


Organizing box for teas made from cardboard - detail

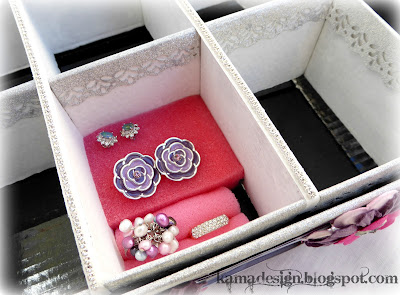
This tutorial can also be adjusted and work as a jewelry organizer. 
I have used a sponge for the earrings and two foams from hairrollers for the rings. Comment down below if you would be interested in seeing a jewelryorganizing tutorial.


Organizing box for jewelry made from cardboard

Until next time: keep crafting!

post signature