Just a quick note to let you know I found a fabulous site with lots of tips and tricks on how to use the Annie Sloan's chalkpaint. If you make a project using the chalk paint - let me know. I'd love to see what you've made.
Sunday, 5 June 2016

Friday, 3 June 2016
Find joy in the little things...Guest designer

Finally june and that means my guest designer spot at the
This week I have been given this cute image to play with.
It's by digital delights by Louby Loo and it's called
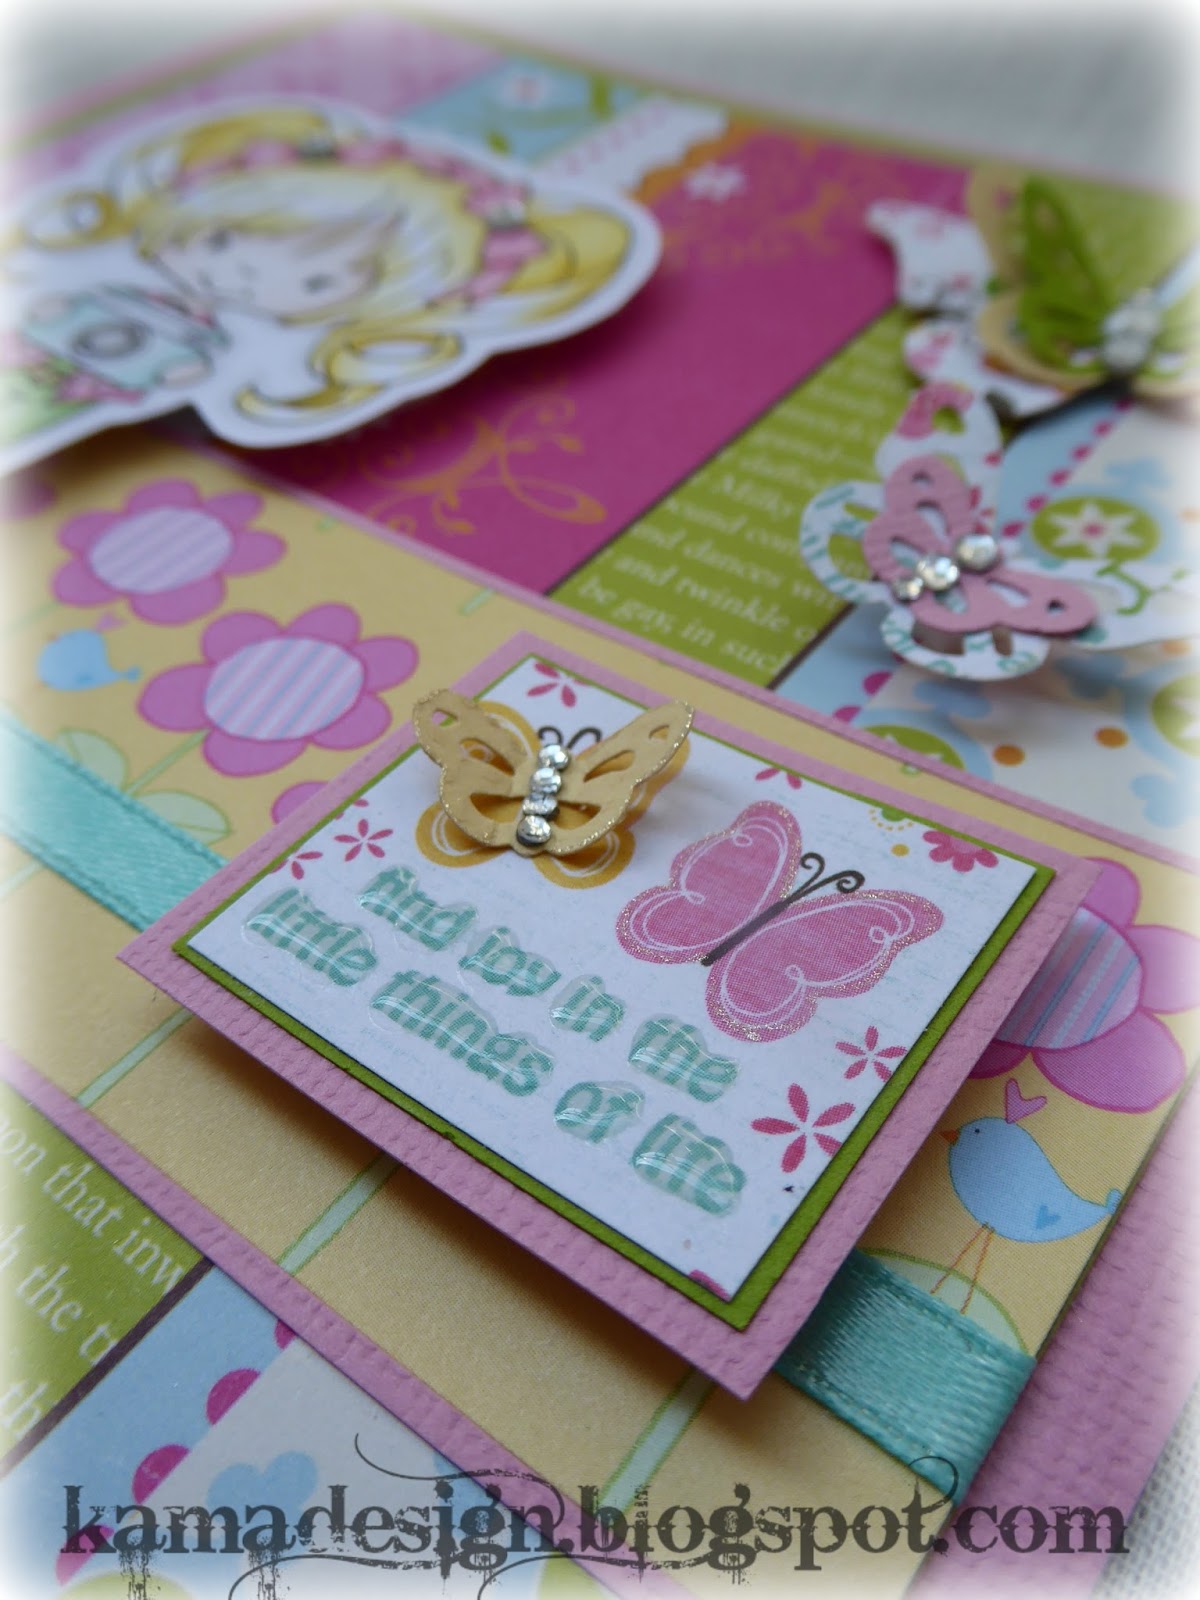
I wanted to make a bright and happy card to match this image. I was thinking about summer and taking vacationphotos. I found these brightly colored papers in my stash and thought they worked wonderfully with the theme in mind.

I used three different patterned papers, but only used the sentiment and butterfly cutouts from one of them (middle). I actually colored the image to match it and in the end only used those tiny pieces. Sometimes you just gotta go with the flow.


I used two different punches and a die to get all these butterflies. The border punch is very versatile as you can cut out the different butterflies and get lots of different ones.

The image is colored using promarkers. I usually use 2-3 shades of the same color. For instance, the camera is colored using three different ones: soft green, pastel green and tea green.
 |
| Detail of all the shimmer and bling that doesn't show as well in daylight. |

Tip of the day:
Instead of matting you can use tiny slices of paper to add to the edges. This gives a similar look to matting, but saves cardstock and makes your card lighter.

Supplies:
Stamp: digistamp by Digital delights "Say cheese Polly"
Papers: making memories - Flutter - "paper stripe flutter", heidi grace designs - it's my party - "tall flower", imaginisce - lucy bird - "tweet talk"
Color: promarkers, sakura gelly roll (glitter pen)
Dies: spellbinders shapeabilities "butterflies two", Martha Stewart punch monarch butterfly and butterfly border
Other: blingstones, dimensional glaze
Challenges:
All sorts - in the pink
Alphabet challenge - G is for girlie
C.R.A.F.T. challenge - recipe (1 image, rhinestones, 1 ribbon, 3 papers, 1 sentiment)
Crafty catz - add a butterfly
Creative inspirations - anything goes + sketch
Kraftin' Kimmie - anything goes
Penny's challenge - anything goes
Stampavie and more - pink
Tuesday, 31 May 2016
Happy mother's day card

This sunday we celebrated mother's day here in Sweden.
I made a very cute "safari" card for my mother-in-law.
She loves watching real-life safari so I thought these stamps from Whiff of joy would be perfect for her.
 |
| The text says: "On mother's day to the world's greatest, greatest mom, (and mother-in-law" on the inside)." |
I wanted to make a card that you could pull out and that would contain the words "world's greatest, greatest" on each panel.
I didn't follow any specific measurements, just made a template in copypaper and transferred it to cardstock. The paper is scored at 7,7,8,8cm and is about 15cm high. The lion and monkey are on the smaller panels.

I glued on a diecut tab and drew an arrow so it would be more clear that you needed to pull out the inside.

The words I wrote with my dymo labelmaker. Love the look it gave together with these papers.

The patterned papers are scrappieces I had that I combined together myself. Love the kind of African vibe they have.

Supplies:
Stamps: Whiff of joy
Colors: oilpencils (animals) and promarkers (details like bouquet, balloons and branch), gold marker
Papers: Mixed scrappieces
Die: quickutz nameplate RS 0801
Other: dymo labelmaker
Cute card thursday - holidays/vacation
Ooh-la-la - 4 legs, not 2
Passion for promarkers - furry friends
Penny's challenges - anything goes
Simon says wednesday - anything goes
Passion for promarkers - furry friends
Penny's challenges - anything goes
Simon says wednesday - anything goes
Tuesday, 24 May 2016
A Can-Can happy birthday easel card

Welcome back to my blog. Hope you had a great weekend.
Let me show you a joyful birthdaycard today.
It is so simple to make and makes such a statement. Looks quite advanced, don't you think?

The way you make it is that you take a piece of "normal" card with the folding on top and fold the top part once more in half. This is your cardbase.
Then you do your imagepanel and attach it by using adhesive on the bottom half as seen on picture. Am I making any sense?
If not, search for "easelcard".

You will however need something that stands up a bit on the bottom part, that will hinder the card from sliding and help it stand up. Here I used a strip of patterned paper I glued on a piece of heavier card and attached it with 3D-tape (dimensional tape). This works as a "stopper".

On the pink panel where the card is signed I made a "shadoweffect". I did this by cutting out the same shape, but in black cardstock and adhering it a bit to the side. This gives the panel this shadow-effect.
 |
| Detail of the hairdecoration. I've used dimensional glaze for the heart and the lipstick (drawn out with a toothpick) and liquid pearls applied with a toothpick for the "pearls" around the heart. The feather gets some glitter from a glittery gel roller. |
When I make a card I usually start with the image. Then I think about the person I'm making the card for or what feel I want to convey. To this image and for the recipient I wanted to make a kind of explosive card with bright colors and some pizzazz.
After choosing the image I needed some papers to match. I do it either by taking a whole paperline or matching myself by looking through my scrappile. For this I went through my scrappile. Would you be interested to see how I sort my scrappieces?

When I've chosen the image and papers I look through my promarkers and choose the colors to match the papers. I have most of the colors and keep a chart where I draw a line with the marker and next to it write up the name of the color. I keep them colorsorted and have them drawn near an edge so I can keep the edge against the papers and compare which color works best. Right now the colors have faded so I need a new one. Let me know if you'd be interested in seeing it here.
I was a bit hesitant on just using a simple layout with the round image on a square panel, but with the papers being so busy and the image so explosive I decided it didn't need that much more. The last thing I did was the feathers that I arranged so it looked like fireworks and a panel to the right with a handwritten "GRATTIS" (which means "congrats" in swedish).
I found it a bit boring applying such a fun panel to a plain folded piece of cardstock and remembered the idea of the easel card. This makes the card more interesting, adds a fabulous inside and if you don't want to write more than just who it's from - it is perfect for you.
Supplies:
Stamp: Kraftin' Kimmie "Suzette"
Papers: Main background paper: Glitz design, sei - lovebirds - "love note" (the shimmery stripe on the inside)
Dies: Spellbinders circle, tags and feathers
Coloring: promarkers and watercolor pencils (aquarells)
Others: dimensional glaze, 3D-tape, liquid pearls, pearls on a string, glitterpen
Challenges:
All sorts (celebrating 7 years of challenges. Yey!) - happy birthday
Crafty catz - Anything goes
Crazy challenge - your favorite color (fushia/pinks)
Everybody art - For girls
Fussy and fancy - Dies and/or punches
I love promarkers - Anything goes
Simon says stamp monday - make a wish
Try it on tuesday - I can hear music
Friday, 20 May 2016
New project on the way and a guest designer spot next week

Let me show you my next project in waiting. It's this horribly ugly nightstand that I'm "dyeing" to get some paint on. It has a wonderful shape though and I think it will look great when it's transformed.
I've purchased Annie Sloan's chalk paints (white and basic colors) and will mix my own hues. I want the nightstand to be some kind of shabby white, but I don't know what color to use underneath. Which color would you like to see? I'm thinking about a pale grey or lilac, but maybe you would like to see babypink or some kind of green? Leave a comment and we'll see what this will turn out like.
It will be up for sale (Skåne area) so if you love the shape of it and are thinking about any specific shade, let me know. It doesn't matter to me what color I play with and don't worry - you're not obligated to buy it if you don't like the endresult.
It measures about 38x37x56
Then I have some other news to share with you. Remember this?

I have made a project with it. I ended up not using the Annie Sloan paints, but some fabulous papers from Graphic45 instead.
The absolute best part is that it will be shown as my guest designer project on the
I think I will be able to post it on this wednesday so make sure to check back by then. Here's a sneak peak:

Wishing you a fantastic weekend.
Tuesday, 17 May 2016
Snail mail Christmas and exciting news
Welcome back to my blog and to another cardtuesday.
I've noticed that tuedays work pretty good with showing you cards and fridays for other projects. Do you agree?

So today I want to show you a Christmascard using a sweet Penny Black image. Let's be honest - it feels like Christmas is lightyears away, but each year it sneaks up on us cardmakers. Am I right or am I right? In my book you can never be too early for making Christmascards. Heck, I even start making them before the year has ended :D

This is a quite simple card, but using glittery paper and a nicely colored image it gives the card a lift. When I color my images I like letting them do the talking.
As for the news...
For the month of june you will be able to see my cards on the
I've been invited to be the guest designer for june!
I'm so excited!
Supplies:
Stamp: Penny Black (don't have the stamp anymore. If you know the name of it, let me know)Papers: Free papers that came with an english craft magazine
Tools: Image colored with promarkers, snowflakes stamped with distress ink
Challenges:
Aud sentiments - Anything goes + sentiment
Bunny Zoe's - Lovely layers
Creative inspirations - Shape it up (no square cards)
Creative moments - Anything goes
I love promarkers - Lace and/or ribbon
Passion for promarkers - Spots and/or stripes
Penny's challenges - Anything goes
Sketch saturday - sketch
The crazy challenge - 3 layers or more
The ribbon girl - Any image
Friday, 13 May 2016
Vintage flower necklace

Allow me to show you another necklace I have made. I'm very much into this style of jewelrymaking lately where you use metalwire to connect the beads together.

This time I have used crackeled- glass- and waxbeads together with some metal flowers, beadcaps and tiny beads.

Although the necklace is big enough to fit over your head, I decided to use a clasp in case you have a big hairdo and don't want to risk messing it up.
 |
| Clasp: opened, front and backside. |
I really love the vintage feel of this necklace. Greys and soft lilac tones together with creamcolored beads. I also love the silvercolored metalpieces with the black details.
What do you think?
 |
Detail of the hanging pendant part. |
If you're interested you can snag it right away.
Just email me (details in the "about me" link top right)
Tuesday, 10 May 2016
Easter wishes feathered card

Another tuesday and that means: another cardreveal.
Today I want to show you an eastercard using different layers and papers.

The card is made with two different patterned papers (the feathers and the ones with the chickens)
The image itself comes from a 12x12" paper that had a bunch of different easterthemed tags. I really love those kinds of papers for a quick card. To make the image more interesting I added craqueler medium to the border around it. Eggs and cracks kind of go together, don't you think?
The yellow panel is dryembossed using an embossingfolder. I got it with a magazine or something like that, so unfortunately I can't tell you where you can get it. If you recognize it, let me know and I'll write it here. The ribbons were plain white that I colored in using my promarkers to match the colorscheme.

I used a gold- and silverpen for the edges and used some cutoff corners of the chickenpaper to add a nice cornerdetail. Waste not, want not, huh?
Challenges:
Alphabet - E for embossing
Crafty calendar - Things with wingsCreative card crew - Anything goes
Fab n funky - 3 or more layers
Simon monday - emboss it
Southern girls - texture
Friday, 6 May 2016
Lavender crocheted headband with freshwater pearls
Another friday and another project.
This time I want to show you a crocheted headband I made a while ago that I've been using all spring.

The pattern is not really a pattern. I just casted a couple of chains that I thought would be enough for the width of the headband. It was about 12 or 13 stitches. Then I crocheted the double crochet stitch (if I'm not mistaken) until the headband was long enough to fit around my head. Finally I slip stitched it together.

The flowers I improvised, making a magic ring and then stitching first in the front loops only, then after the circle was complete - in backloops only.
I sewed on the freshwater pearls to the flowers, then attached the flowers to the headband.
Hope you like it :)
Friday, 29 April 2016
Bird key cabochon necklace

Three weeks ago I made a post asking which of three projects you would like to see first. I didn't get that much feedback so I started on this necklace.

I have used a key with a glass cabochon, which is a piece of glass polished evenly. Under the glass there is a beautiful image of a bird. I think finding the perfect image for this necklace took me almost as long as making the necklace itself. But I'm glad I was so stubborn to find the perfect piece since I think it really makes the whole thing very coherent.

I have used blue fresh water pearls with a hint of pink (that match the image perfectly). I also used crystal AB polished beads that give a hint of pink and blue. These are the ones that look clear, but catch the light like a prism.
I also have some blue wax beads with silver beadcaps and two silver colored birds.

The beaded part measures 78cm (about 30" - a so called "opera" length) and the key is 7x3cm.

This necklace will eventually be available in my shop (either etsy, zibbet or any other I find. If you have any tips, let me know) for under $30+shipping. If you are interested in buying it leave a comment below or e-mail me (address by viewing my complete profile top right)
Subscribe to:
Posts (Atom)