Thank you for still stopping by my little blog.
Today I'd like to show you something I haven't seen out there in blogland. Hopefully I'm one of the first :)
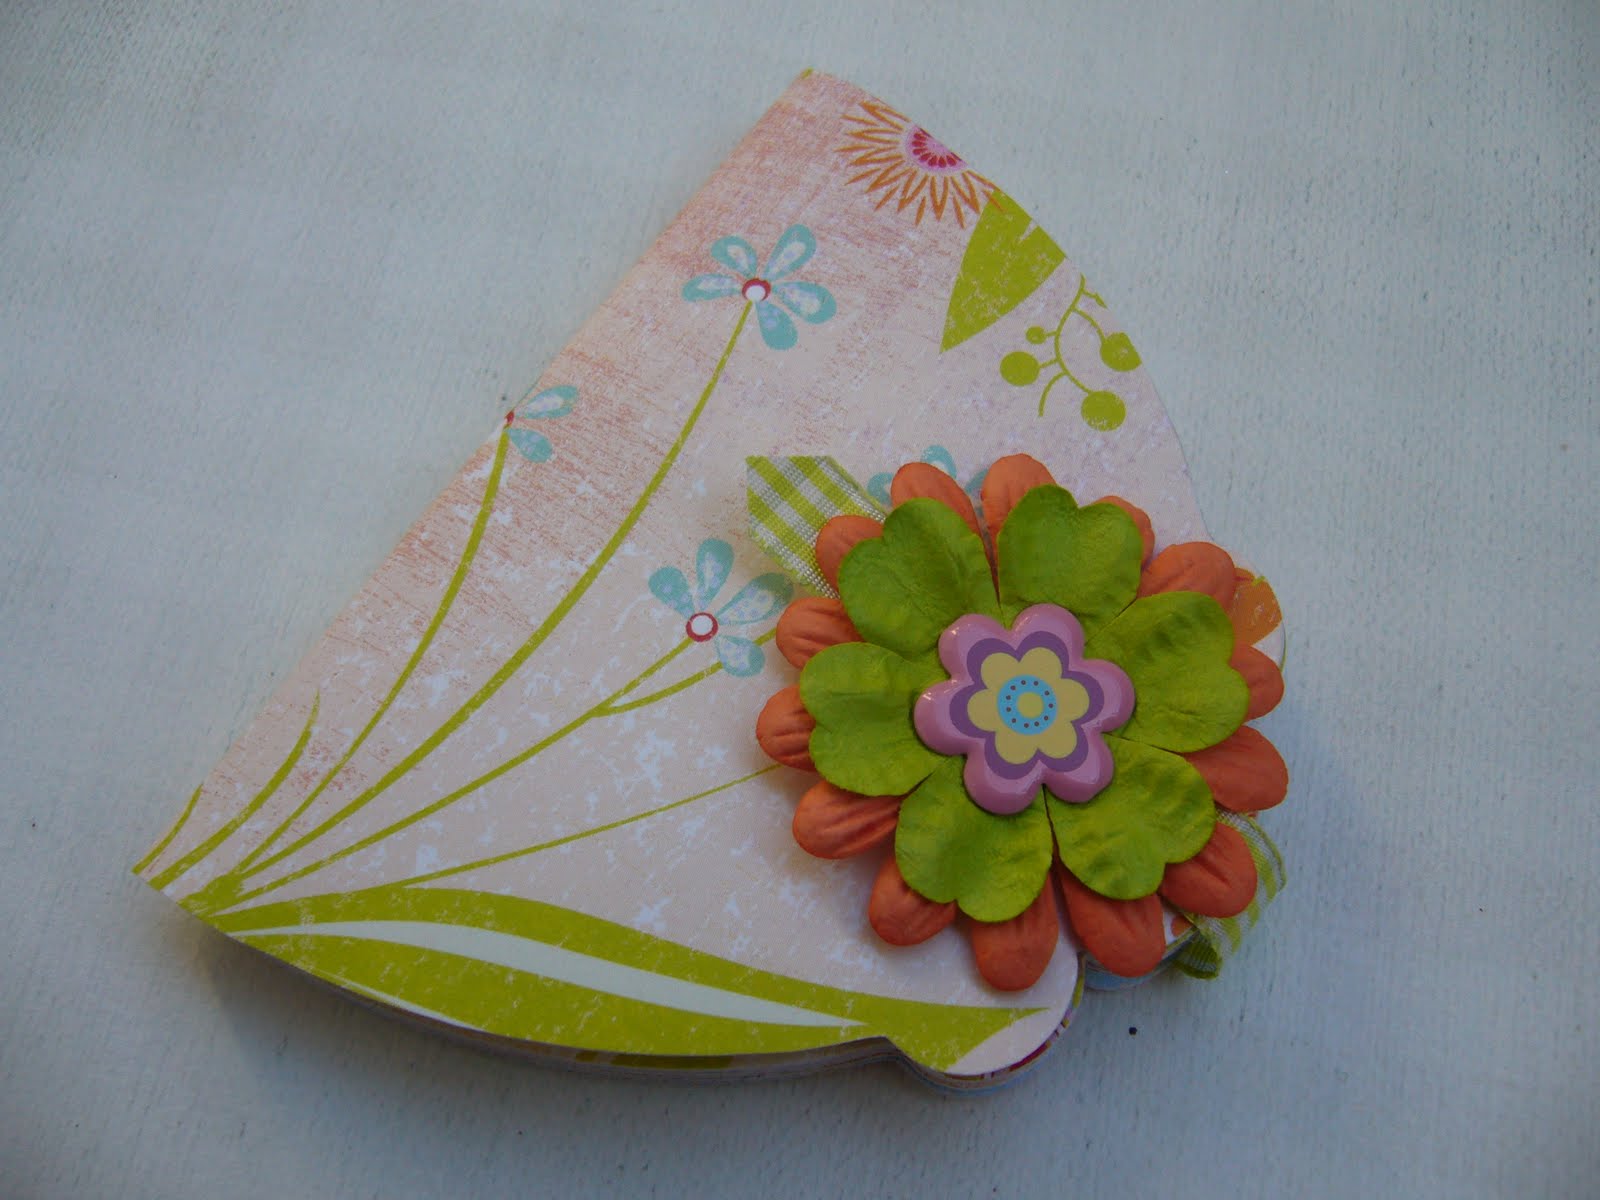
It's a minialbum using the bigger nestabilities. Here I have used the biggest one from labels ten. You can use the biggest die of any shape if you'd like, but I wanted my album to be as big as possible so I aimed for the huge ones. I think I'll fill this one with photos of flowers I've taken throughout the years.
I started out by cutting out as many pages as possible from my Basic Grey papers (don't remember what the line is called as I used scraps from a previous project) Bend the paper to form a U shape so you know how
to position the die. You will want the least resistance when you bend it. That way it will fold nicely without
cracking or leaving ugly marks. I used 11 different papers + a bigger piece for the front and back. I used papers that were white on the back so I didn't feel like I wasted the pretty backside. I suggest you use a bit heavier patterned paper, but not as heavy as double sided. BG papers are perfect for this as the pages turn out sturdy enough, but not too bulky.
Fold your cut out pieces in half and arrange them on top of eachother. Glue them back to back. I use a glue called platonal, which is a bookbinder's glue that's acidfree and that doesn't crack over time.
Set aside to dry while you work on the cover. The cover is made out of one piece. You can't cut it out with the die as the sides would be too short (you need to count in the width of your glued together papers).
Press together your soon to be album while measuring or the back will crease. But leave a little room for photos and embellishments. Just enough is the key :)
I cut out a shape on a scrappaper, devided it in half and then set them apart so I could see how much space I needed for the back. Then I traced the shape on the backside of the patterned paper and cut out by hand.
Crease and bend the cover:
Finally decide on what kind of closing you'd like. You could add two pieces of ribbon between the cover and album to tie it closed. I decided to use my magnetic snaps I'd bought oh, like 7 years ago or so. I only attached one piece of ribbon on the back, then glued it all together. Leave the middle part unglued, just glue front and back.
Attach a flower to the ribbon and glue on a magnetic snap. I only glued one snap to the ribbon and waited before I glue on the other one on the front. I want to fill my album with photos and embellishments first - that way I'll know where to glue the snap.
Did you notice the position of the flower on the front cover? Together with the patterned paper it looks like it's a part of it.
Hope you'll give this a try and if you do, leave me a comment so I can take a look.
The colour I used are perfect for this week's photo inspiration challenge at the
Basic Grey blog
I'm also participating with this album at
pile it on that had fold it as one of the themes.