I'm missing your comments, but serves me right for not blogging lately. I haven't been still though - I have a couple of items to show you so stay tuned. First I'd like to show you a project I'm very proud of AND a tutorial. If you know any magazines that have an upcoming challenge or style that this mask would fit in, let me know. I'd love to be published again.
I'm finally back with a project that I'm over the moon about. I got the idea as soon as I saw
masked fairy in green. She is holding a mask which I thought would be wonderful for this project.
This is my first try to decorate something that isn't too flat. I'll share my tips with you so you can do the same. It's not that difficult, but the result is stunning.
Here's what I used:
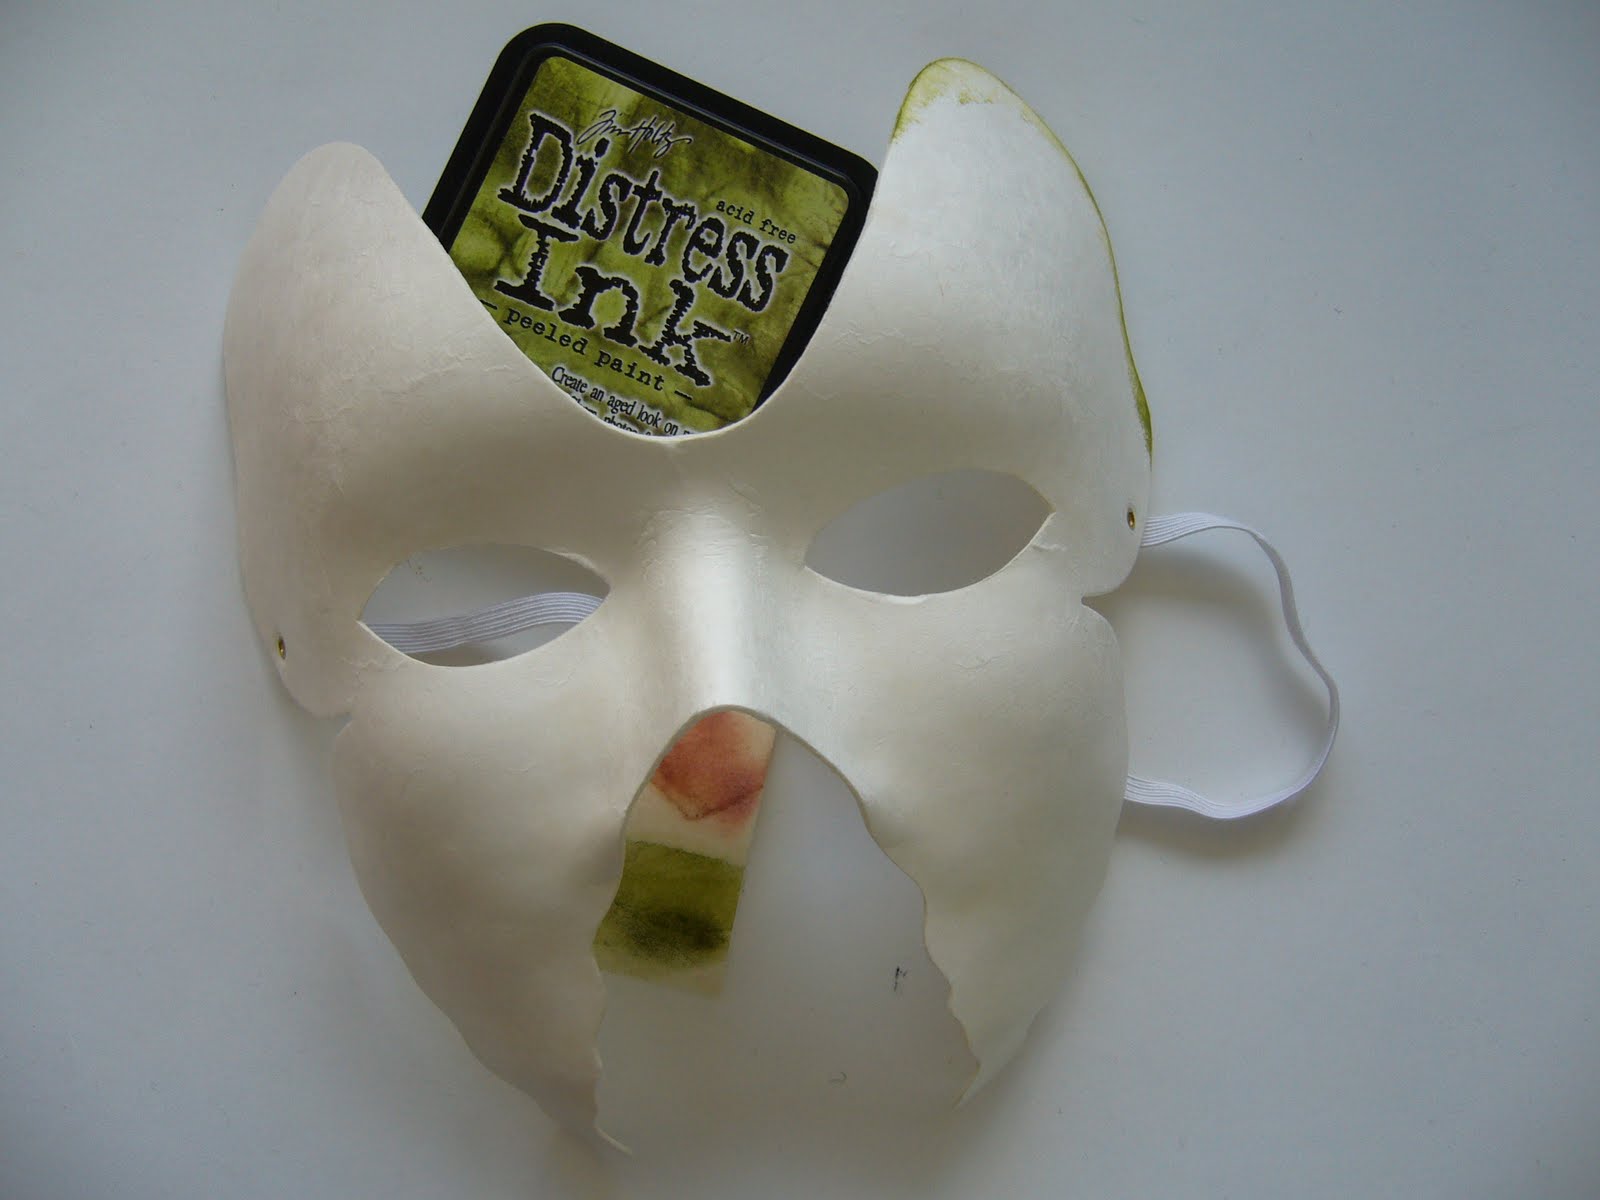
a plain white mask - I got mine in a hobby store for $3
some kind of ink or paint - I used distress ink in green, blue and red
a selection of stamps and thin paper (like the one you use to gift wrap)
decoupage glue
black ink + colouring medium - I used promarkers
glue
ribbons and bling
my sewing machine to attach ribbon to the rubber band (optional)
Start by inking the edges of your mask. Don't ink the mask itself unless you know exactly where your images will go. After making the left side I thought I was done so I inked the right side with bright red. Then I realized I wanted another image to be the focal point. Unfortunately when I glued her on, the bright red shone through. That's why the fairy on the right is so red around her face. So learn from my mistakes :)
Set the mask aside to dry and stamp up your images on the paper (I only had light pink, a packaging from a gift, but if you want your colouring to be more accurate you should use white. I used what I had). I tried to stamp where there were no creases to get a good impression. I also tried to choose stamps that could easily be cut out with no tiny details. Colour them and cut out.
Now for the fun, and scary part! Gluing them on.
DO NOT put the decoupage glue on the images. Since the paper is so thin it will rip. Put the glue on the mask instead and the image on top. If you have slightly more glue you will be able to smooth the image out properly. Put the images so they go outside the edges. Cut away so there is about 1/2 inch or less and fold it around the edges.
Work this way one image at a time. Don't be afraid to use parts of an image to cover up any white parts. I used a wing to cover up a spot on the top.
When you're happy with the result fill in any white parts with ink or paint. When it's dry, brush on some decoupage glue over the whole mask to seal it and make it more durable (we wouldn't want the mask to get ruined in the champagne rain, right?)
Now the only thing left to do is to decorate the mask even more. I thought it looked great as it was, but something was still missing. I inked the rubber band, but didn't think it looked elegant enough, so I tried with different ribbons and lace I had until I found the best combo.
The trims I used were stretchy which was perfect for the rubber band/neck holder. It doesn't have to be perfect, just needs to stick. If you don't have any stretchy trims you could cut away the rubber band and attach long silky ribbon that you tie at the back of your head. Didn't think of it until now. I sewed mine on with a seam made for stretchy fabrics. Another solution is to pull the rubber band while you sew. This will make the ribbon you use to scrunch up when the rubber band goes to its original form.
When you're happy with that attach some trims around the edges. I found these mini-clasps a tremendous help while waiting for the glue to dry. Just make sure you don't leave them over night as they will glue to the mask!
Finally glue on some bling around one of the eyes.
Tadaa! You have the most wonderful (if slightly itchy around the forehead) mask on the whole carnival.
Here's a tip when working with the images: If you want to use an image and a side is "chopped off" so to speak, you can either put that side close to an edge OR do like I did with the image above. If you have an eye for details you will notice that the wings are not really hers. I used a wing from
midnight waiting, stamped it twice and coloured one from the front and one on the back of the paper to make it mirrored. Then they are cut out and aligned so the main stamp image can be put on top without the edges showing through - because they do. Another reason that this stamp was so great - her straps on her shoulders cover up the edges.
Stamps used for this project:
Masked fairy in green
Moonlight whispering
Love is gone
Midnight waiting
Forest blue
Time flies
All stamps by
sweetpea stamps
Hope you've gotten inspired to use your Sweet Pea images for other than just flat items. If you do, make sure to let me know so I can take a look.


